
Fruit Scone Recipe: Ready in 30 Minutes!

What Makes This Fruit Scone Recipe Special?
I have always loved scones, especially fruit scones. They remind me of cozy afternoons spent with my grandmother, sipping tea and nibbling on these delightful treats. This fruit scone recipe has been perfected over the years, combining the traditional British scone with a burst of fruity goodness. Whether you're hosting a tea party or just craving a comforting snack, this recipe will not disappoint.
Scones are a staple in many households, and each family seems to have their own twist on the classic fruit scone recipe. My version is packed with dried fruits, giving each bite a sweet, chewy texture that contrasts beautifully with the crumbly, buttery scone. The key to a perfect scone lies in the balance of ingredients and the method of preparation, which I'll walk you through step-by-step.
Why You'll Love This Fruit Scone Recipe

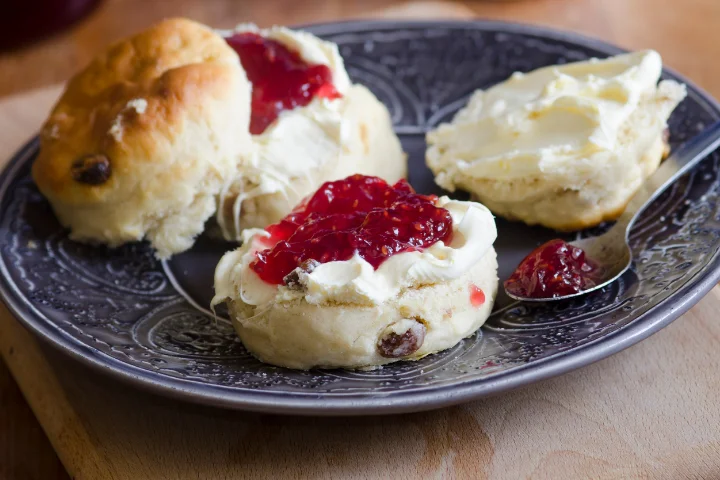
This fruit scone recipe is perfect for both novice and experienced bakers. The ingredients are simple and straightforward, and the steps are easy to follow. The result is a batch of scones that are light, fluffy, and bursting with fruity goodness. Whether you're serving them fresh out of the oven with a dollop of clotted cream and jam, or enjoying them as a quick breakfast on the go, these scones are sure to become a favorite in your household.
Benefits of Making Your Own Scones

Making your own fruit scones at home has several advantages. Firstly, you can control the quality of the ingredients, ensuring that your scones are made with the best and freshest components. Secondly, homemade scones are free from preservatives and artificial flavors that are often found in store-bought versions. Finally, there's something incredibly satisfying about baking your own scones – the process is therapeutic, and the end result is a warm, fragrant batch of scones that you can be proud of.
Now that you're excited to make your own fruit scones, let's gather the ingredients and get started on this delightful baking adventure!
Discover the ultimate fruit scone recipe that’s perfect for any occasion. These scones are light, fluffy, and packed with your favorite dried fruits like raisins, cranberries, or apricots. With simple ingredients and easy-to-follow instructions, you can whip up a batch of these delightful scones in no time. Serve them warm with clotted cream and jam for a traditional British tea-time experience or enjoy them as a quick breakfast on the go. This recipe ensures that your scones are buttery, crumbly, and bursting with fruity flavor in every bite. Whether you’re a novice baker or a seasoned pro, this scone recipe is sure to become a favorite in your kitchen. Plus, with tips on how to customize the recipe to suit your taste, you can make these scones uniquely yours. Try this delicious and versatile recipe today and bring a touch of homemade goodness to your table.
- 2 all-purpose flour
- 1/4 cup granulated sugar
- 1 baking powder
- 1/2 salt
- 1/2 unsalted butter (cold and cut into small cubes)
- 1/2 cup dried fruit (raisins, cranberries, or your favorite mix)
- 1/2 cup buttermilk
- 1 egg
- 1 vanilla extract
- 1 heavy cream (for brushing)
- 1 coarse sugar (optional, for sprinkling)
- Preheat Your Oven

Preheat your oven to 400°F (200°C). Line a baking sheet with parchment paper or a silicone baking mat.
- Mix the Dry Ingredients

In a large mixing bowl, whisk together the 2 cups of all-purpose flour, 1/4 cup of granulated sugar, 1 tablespoon of baking powder, and 1/2 teaspoon of salt until well combined.
- Cut in the Butter

Add the 1/2 cup of cold, cubed unsalted butter to the dry ingredients. Using a pastry cutter or your fingers, work the butter into the flour mixture until it resembles coarse crumbs. The butter should still be in small, pea-sized pieces to ensure flaky scones.
- Add the Dried Fruit
Stir in the 1/2 cup of dried fruit of your choice (raisins, cranberries, or a mix). Make sure the fruit is evenly distributed throughout the mixture.
- Mix the Wet Ingredients
In a separate bowl, whisk together the 1/2 cup of buttermilk, 1 large egg, and 1 teaspoon of vanilla extract until well combined.
- Combine Wet and Dry Ingredients
Pour the wet ingredients into the dry ingredients. Using a wooden spoon or a spatula, gently mix until just combined. Be careful not to overmix, as this can make the scones tough.
- Shape the Dough

Turn the dough out onto a lightly floured surface and gently knead it a few times until it comes together. Pat the dough into a round disk about 1 inch thick. Use a sharp knife or a round biscuit cutter to cut the dough into 8-10 scones.
- Prepare for Baking

Place the scones on the prepared baking sheet, leaving a bit of space between each one. Brush the tops with 1 tablespoon of heavy cream and sprinkle with 1 tablespoon of coarse sugar if desired. This will give the scones a beautiful golden color and a slight crunch on top.
- Bake the Scones
Bake the scones in the preheated oven for 15-18 minutes, or until they are golden brown and a toothpick inserted into the center comes out clean. Keep an eye on them, as baking times can vary.
- Cool and Enjoy
Once baked, remove the scones from the oven and let them cool on a wire rack for a few minutes. Serve warm with clotted cream and jam, or enjoy them as is!
Servings 10
- Amount Per Serving
- Calories 250kcal
- % Daily Value *
- Total Fat 12g19%
- Saturated Fat 7g35%
- Cholesterol 55mg19%
- Sodium 300mg13%
- Total Carbohydrate 30g10%
- Dietary Fiber 1g4%
- Sugars 10g
- Protein 4g8%
* Percent Daily Values are based on a 2,000 calorie diet. Your daily value may be higher or lower depending on your calorie needs.
Tips for Perfect Fruit Scones
- Use cold butter: This is crucial for achieving flaky scones. You can even freeze the butter for a few minutes before cutting it into the flour mixture.
- Don’t overmix the dough: Overworking the dough can lead to tough scones. Mix until just combined for the best texture.
- Bake immediately: Once the dough is mixed, bake the scones right away to ensure they rise properly and maintain their texture.
- Dairy-Free: Use dairy-free butter and buttermilk alternatives like almond milk with a tablespoon of lemon juice.

Hi there! I’m Chef Elizabeth Gilbert, your go-to writer and culinary guide at easyrecipes.club. I’m absolutely passionate about exploring and sharing the rich flavors of world cuisine. From cozy comfort foods to exotic dishes that’ll transport your taste buds, I’ve got all the tips and tricks to help you whip up delicious meals with ease. Whether you’re just starting out or you’re a kitchen pro, I’m here to make cooking fun and accessible for everyone. Let’s get cooking and create some mouthwatering dishes together!


Thank You for cooking with us.